
I kept saying “I’ll start next month” until next month never came
A few years ago I had a spreadsheet called “passive income ideas.” It had 23 rows. Every row was something I planned to try “when I had more time.” The spreadsheet sat untouched for 14 months.
What changed wasn’t my schedule. I was just as busy. What changed was realizing that every one of those 23 ideas needed the same thing to get started: a single focused weekend. Not a sabbatical. Not a business plan. Just 48 hours and a willingness to finish something instead of planning it.
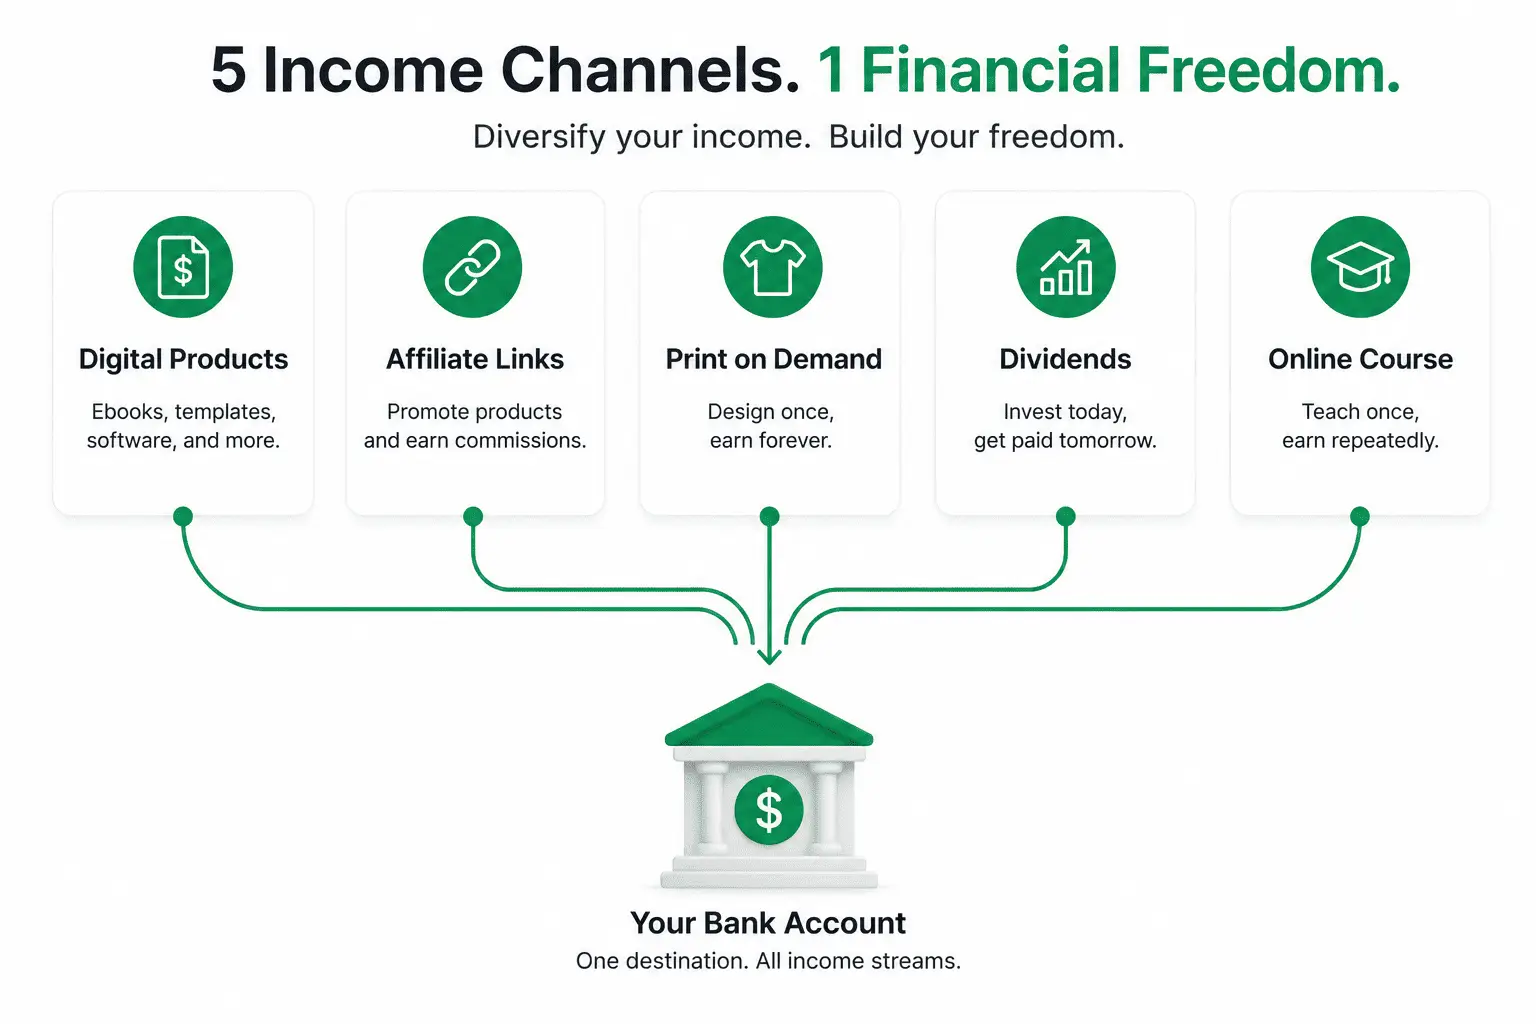
This guide is for you if your list looks like mine did. I’ll walk you through five passive income streams that are genuinely set-up-able in a weekend from zero to first potential dollar with every step spelled out from the basics to the parts most guides skip entirely.
What “passive income” actually means (and what it doesn’t)
Passive income is money that continues flowing in after the initial work is done. You build or buy an asset, such as a digital product, an affiliate site, an investment position and that asset keeps earning without requiring your time every time a sale or payment happens.
It is not zero-effort income. Every stream here requires real upfront work this weekend, plus occasional maintenance afterward. Anyone who tells you passive income is effortless is selling a course about selling courses.
The honest truth: most passive income streams take 3–6 months to become meaningful. This weekend you’re planting seeds, not harvesting. But the seeds you don’t plant this weekend will still be unplanted six months from now.
How to choose which stream to start with
Before diving into all five, pick one to set up completely this weekend. Starting all five simultaneously means finishing none of them. Use this decision guide:
| If you have… | Start with… | Why |
|---|---|---|
| A skill (writing, design, coding, teaching) | Stream 1: Digital products | Fastest path from skill → sale. No inventory, no shipping. |
| A blog, newsletter, or social audience | Stream 2: Affiliate marketing | You already have traffic. Add links to content you’d write anyway. |
| Design ability or ideas for products | Stream 3: Print on demand | Zero upfront inventory cost. Printful/Redbubble handle fulfillment. |
| $500+ you won’t need for 5+ years | Stream 4: Dividend investing | Most truly passive option. No content creation required. |
| Deep knowledge of any topic | Stream 5: Online courses | Highest income ceiling. Takes the most weekend hours but pays long-term. |
Once you pick your stream, follow that section completely before moving on. Partial setups don’t earn money.
Stream 1: Selling digital products
What it is and why it works
A digital product is any file a customer downloads after purchase: templates, eBooks, Notion dashboards, Lightroom presets, code snippets, spreadsheets, design assets, checklists, or guides. You create it once and sell it unlimited times. No manufacturing cost, no shipping, no inventory.
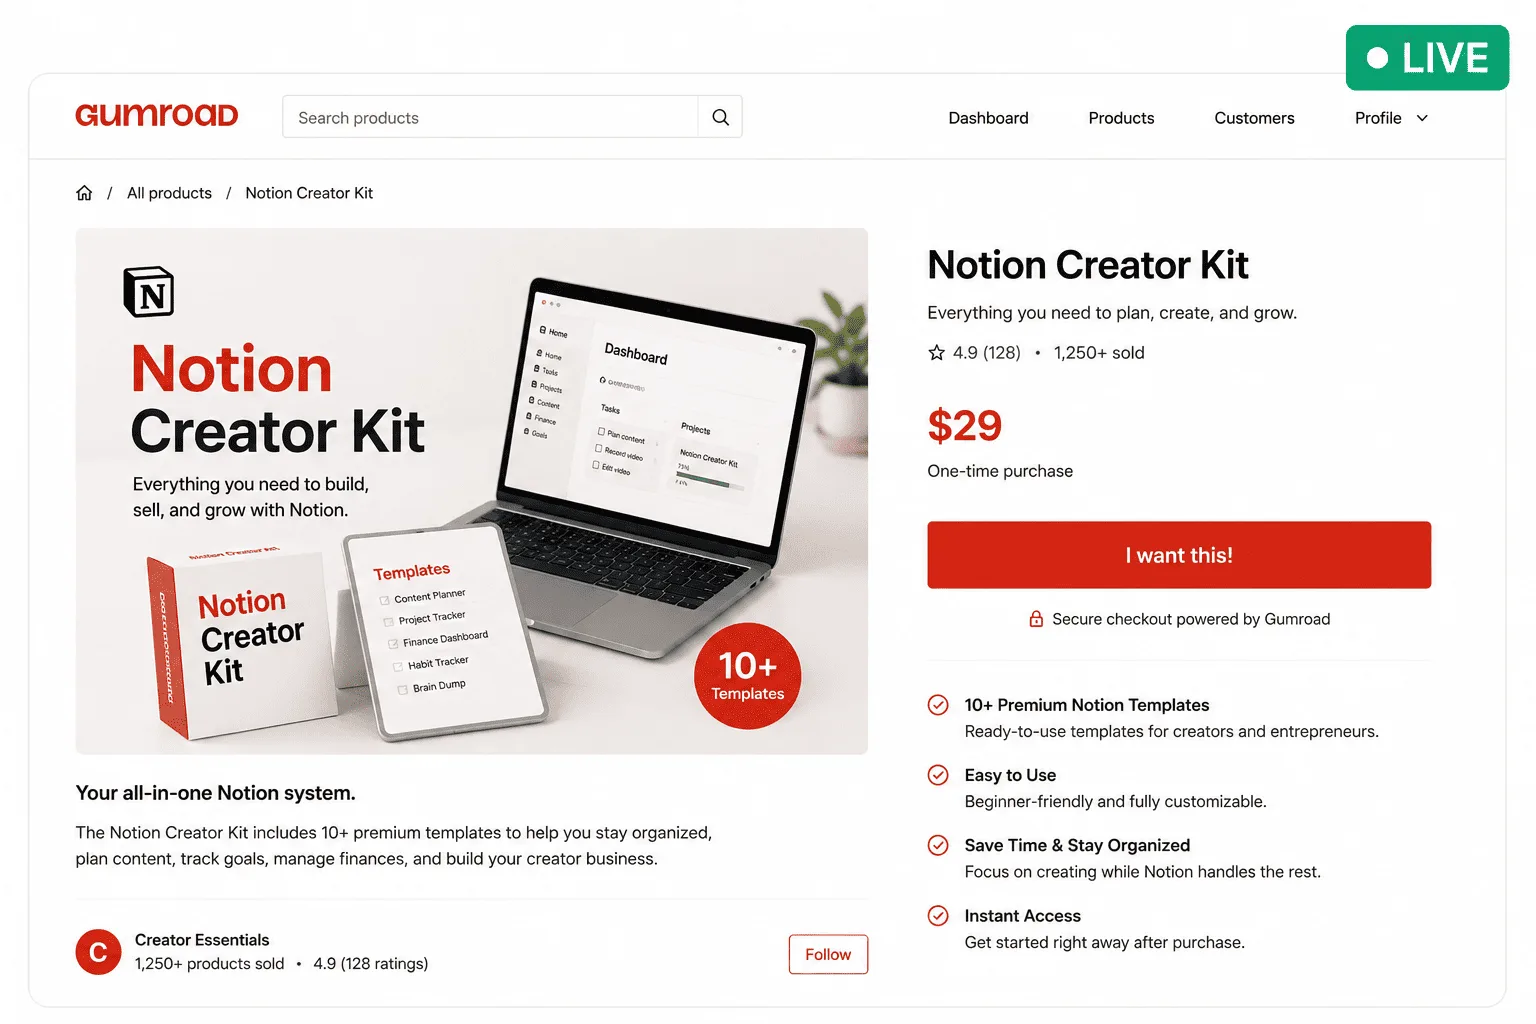
The profit margins are extraordinary, often 90%+, because your only ongoing cost is the platform fee. A $29 Notion template that sells 10 times a month earns $290 with zero additional work after the initial setup.
Step 1 — Identify your sellable skill
Open a blank document and answer this: what do people ask your advice on regularly? What have you figured out that took you weeks but could be packaged into hours for someone else? That gap, your hard-won knowledge vs. someone else’s starting point, is your product.
Strong digital product ideas by skill type:
- Designers: Canva templates, logo packs, UI kits, social media post templates
- Developers: Code snippets, starter kits, VS Code theme packs, automation scripts
- Finance people: Budget spreadsheets, investment trackers, expense calculators
- Writers: Email templates, prompt packs, resume templates, cold outreach scripts
- Photographers: Lightroom presets, Photoshop actions, posing guides
- Marketers: Social media content calendars, swipe files, ad copy templates
Step 2 — Create the product (Saturday morning, 3–4 hours)
Keep your first product small and focused. A 5-page template that solves one specific problem outperforms a sprawling 50-page guide that tries to cover everything. The #1 mistake first-time sellers make is over-building before validating that anyone wants to buy.
For a template-style product, use tools you already know:
- Notion templates: Build in Notion, duplicate the page, share as a template link
- Spreadsheets: Google Sheets or Excel, export as .xlsx
- Design files: Canva (export as PDF or .canva), Figma (export as .fig or PDF)
- eBooks/guides: Write in Google Docs, export as a PDF, clean and simple
Write a title that names the specific outcome: “30-Day Content Calendar Template for Solo Creators” beats “Content Calendar Template” every time. Specificity is what makes buyers click.
Step 3 — Set up your storefront on Gumroad (Saturday afternoon, 1–2 hours)
Gumroad is the fastest way to go from finished file to live product page. It handles payments, file delivery, VAT for international buyers, and customer emails automatically. You don’t need a website.
- Create a free Gumroad account at gumroad.com.
- Click New Product → choose Digital product.
- Upload your file (PDF, ZIP, Notion link, or any file type).
- Write a product description: open with the specific problem it solves, list 5–7 bullet points of what’s included, end with who it’s for.
- Set your price. For a first product: $7–$29 is the sweet spot. Low enough to be an impulse buy, high enough to feel valuable.
- Add a cover image. Use Canva’s free templates search “Gumroad cover” and pick one. A clean cover doubles your conversion rate.
- Hit Publish. Your product is live and purchasable immediately.
Connect your bank account or PayPal in Settings → Payouts, so Gumroad can send you money. Gumroad takes 10% per sale on the free plan acceptable when starting. You can move to their paid plan ($10/month, lower fees) once you’re selling consistently.
Step 4 — Set your first sale up for success (Sunday, 1 hour)
Post your product link where your potential buyers already are. If you have a Twitter/X account: write a thread explaining the problem your product solves, then link to it. If you have a LinkedIn: write a post about the lesson behind the product. If you have zero audience: post in one relevant Reddit community (read the rules first, most communities have a weekly “share your project” thread where self-promotion is allowed).
Your first sale almost never comes from strangers. It comes from someone who already knows you and has been waiting for you to make something.
Stream 2: Affiliate marketing
What it is and why it works
Affiliate marketing means earning a commission when someone buys a product through your unique referral link. You don’t create the product, handle customer service, or manage inventory. You simply recommend products you already use and trust, and earn a percentage of every resulting sale.
Commission rates range from 3% (Amazon) to 50%+ (software companies). A single well-placed affiliate link in a high-traffic article can earn hundreds of dollars a month, indefinitely, from content you wrote once.
Step 1 — Choose your niche and affiliate programs (Friday night or Saturday morning, 1 hour)
The products you promote must match what your audience cares about. A mismatch between your content and your affiliate offers is the most common reason affiliate income stays at zero.
List 10 products or services you use and genuinely recommend. Then check whether each has an affiliate program:
- Search “[product name] affiliate program” on Google.
- Check ShareASale — a marketplace with thousands of affiliate programs across every niche.
- Check PartnerStack — specializes in SaaS companies, which pay high recurring commissions.
- Check the Amazon Associates program for physical products.
Apply to 3–5 programs this weekend. Most approve instantly or within 24 hours. Start promoting the ones that approve you first.
Step 2 — Create content that earns clicks (Saturday, 3–4 hours)
Affiliate links earn money when placed inside content that’s already helping someone make a decision. The three content formats that convert best:
- “Best X for Y” lists “Best project management tools for freelancers.” People reading this are already shopping. They want a recommendation.
- Comparison articles “Notion vs Obsidian: which one is actually better for writers?” These rank well on Google and answer a question with genuine purchase intent.
- Tutorial articles “How to set up email automation with Mailchimp.” Tutorials that reference tools naturally are perfect for affiliate links. You show the tool in action, then link to it.
Write one piece of content this weekend in whichever format fits your niche. Aim for 1,200–2,000 words. Answer the question completely don’t leave the reader needing to Google anything else. Self-contained content ranks better and converts better.
Step 3 — Publish and optimize for search (Sunday, 2 hours)
If you have a WordPress blog, publish the article there. If you don’t have a blog yet, you can start one this weekend on WordPress.com (free) or publish on Medium for immediate distribution. A dedicated blog is better long-term, you own the audience and the SEO equity, but don’t let “I don’t have a blog yet” stop you from publishing this weekend.
For every affiliate link, follow these rules:
- Disclose the affiliate relationship. Use a short, honest line at the top of the article: “This article contains affiliate links. I earn a small commission at no extra cost to you if you buy through my links.” This is legally required in most countries and builds trust with readers.
- Link naturally. The link should appear where a reader would naturally want to click after you describe what the product does, not awkwardly inserted mid-sentence.
- Never link to products you haven’t used. Readers can tell. Fake recommendations destroy the trust that makes affiliate marketing work.
Step 4 — Track your links (Sunday, 30 minutes)
Most affiliate dashboards show you clicks and conversions, but tracking across multiple programs gets messy. Use a free tool like Pretty Links (WordPress plugin) to create clean, branded short links and see click data in one dashboard. This becomes invaluable when you have 10+ affiliate relationships and need to know which content is actually driving sales.
Stream 3: Print on demand
What it is and why it works
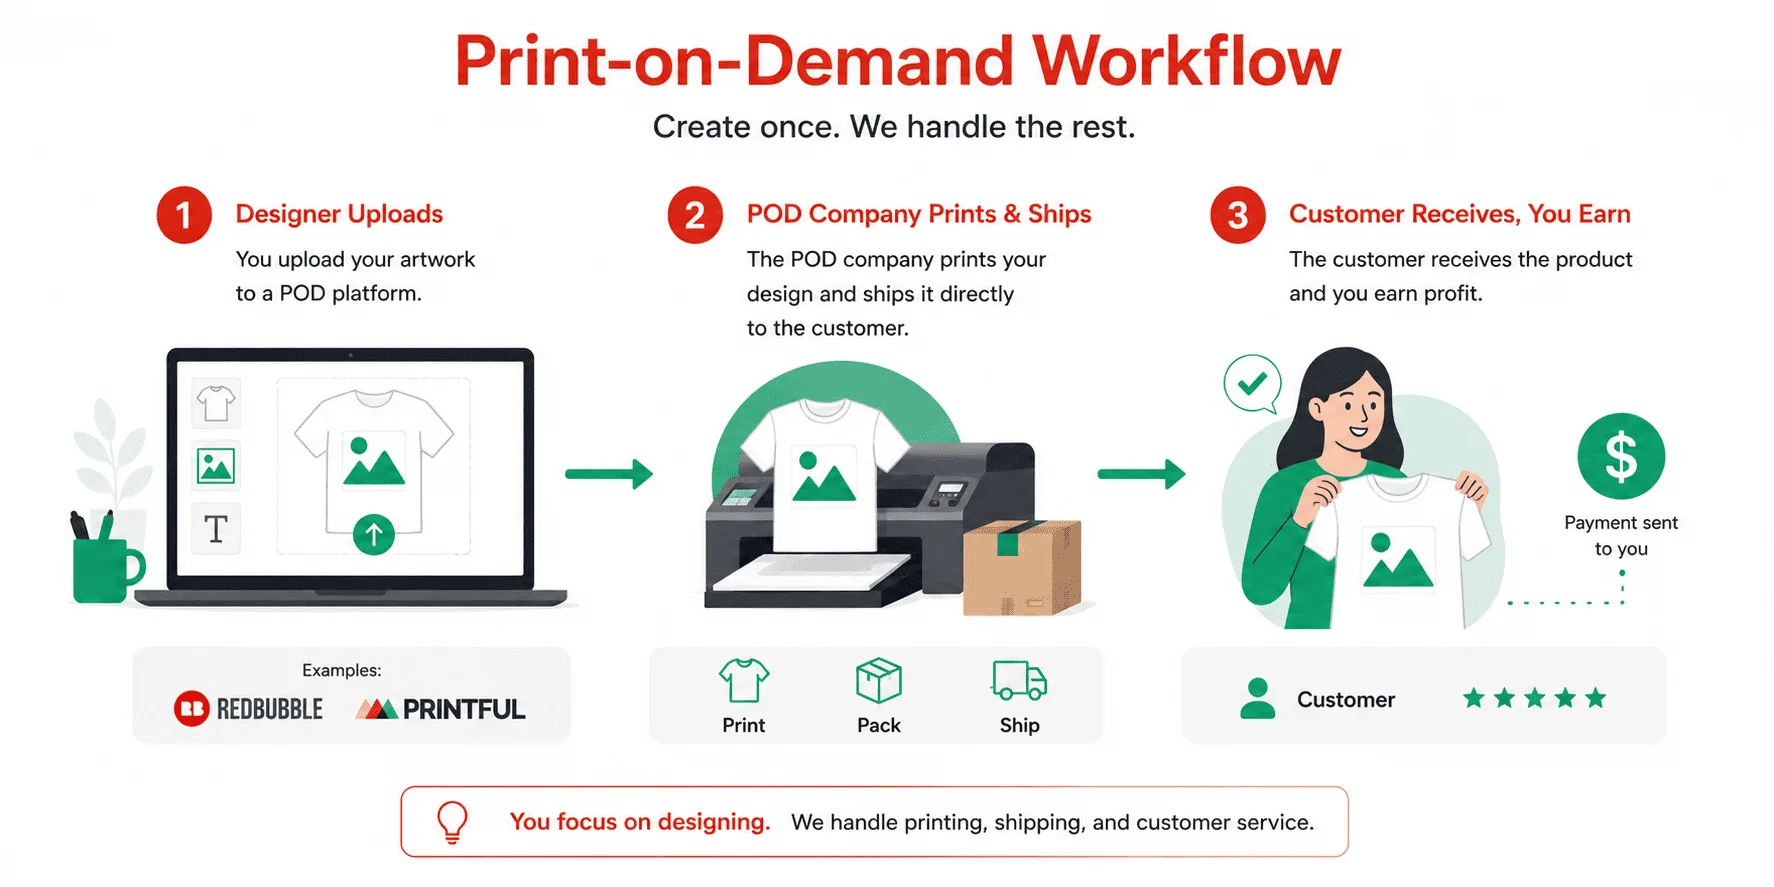
Print on demand (POD) lets you sell custom-designed physical products, such as t-shirts, mugs, tote bags, phone cases, posters, and hoodies, without ever touching inventory. When a customer orders, the POD company prints and ships the product directly to them. You earn the margin between your retail price and their base cost.
There’s zero upfront cost. You upload a design, set a price, and share your store link. The POD company handles everything else. It’s the closest thing to truly passive physical product sales that exists.
Step 1 — Choose your POD platform (30 minutes)
Two platforms dominate for beginners:
- Redbubble: Upload designs, and your products are instantly listed in Redbubble’s marketplace. Built-in traffic means strangers can discover your products without you driving them there. Best for designers who want passive discoverability.
- Printful + Etsy: More control, higher margins, but you drive your own traffic via Etsy’s search. Printful integrates directly with your Etsy shop and fulfills orders automatically. Best for creators who already have an audience or who will actively market.
For your first weekend: start with Redbubble. You can upload designs and have a live storefront within an hour. Move to Printful + Etsy later when you’re ready to invest more in marketing.
Step 2 — Design your products (Saturday, 3–5 hours)
You don’t need to be a professional graphic designer. The POD products that sell consistently share one trait: they speak directly to a specific group of people. Generic designs don’t sell. Niche designs do.
Strong POD niches with proven demand:
- Profession-specific humour (“Trust me, I’m an accountant”)
- Pet breed fans (“Proud Golden Retriever Parent”)
- Hobbies and fandoms (hiking, rock climbing, knitting, tabletop gaming)
- Local pride (city names, state outlines, regional landmarks)
- Motivational quotes with distinctive typography
Create 5–10 designs this weekend using Canva‘s free plan. Use PNG format with a transparent background (required by most POD platforms). Dimensions for most platforms: 4500 × 5400 pixels at 150 DPI for apparel.
Step 3 — Upload and configure your store (Saturday afternoon, 1–2 hours)
On Redbubble:
- Create a free account and go to Add New Work.
- Upload your PNG file. Redbubble automatically applies it to all product types (t-shirts, mugs, stickers, phone cases, etc.).
- Review the mockup preview for each product type. Disable products where your design doesn’t look good. It’s better to sell on 8 product types well than 20 product types poorly.
- Write a descriptive title and tags. Tags are how Redbubble’s internal search finds your products. Use 15 tags per product. Think like your buyer: “funny nurse gift,” “RN graduation present,” “nurse life shirt.”
- Set your markup. Redbubble has a base cost per product; you set the markup on top. Start at 20–30% markup, competitive enough to appear in search results, high enough to be worth your time.
- Publish. Your designs are immediately live and searchable.
Repeat for all your designs. The more quality designs you upload, the more surface area you have in Redbubble’s search. Many successful POD sellers have 100+ designs — yours will start with 5–10 and grow from there.
Step 4 — Research what’s already selling (Sunday, 1 hour)
Before uploading your next batch of designs, spend an hour researching the market. On Redbubble: search your niche keyword and sort by “Most Relevant.” The top results are selling their titles, tags, and design styles. On Etsy: search your niche and filter by “Most Recent” to see what’s being listed, and “Bestseller” to see what’s selling. Build your next designs around proven demand, not guesses.
Stream 4: Dividend investing
What it is and why it works
Dividend investing means buying shares of companies or funds that distribute a portion of their earnings to shareholders on a regular schedule, typically quarterly. You hold the shares and collect cash payments without selling anything. This is the most hands-off passive income stream on this list once the account is set up.
Dividend income is genuinely passive. There is no content to create, no product to maintain, no customer to serve. The asset (your shares) does the work. The trade-off: it requires capital to start, and meaningful income requires meaningful investment.
Step 1 — Understand the key numbers before buying anything (Saturday morning, 1 hour)
Three metrics matter when evaluating dividend investments:
- Dividend yield: Annual dividend per share ÷ current share price, expressed as a percentage. A $100 stock paying $4/year has a 4% yield. Higher yield sounds better, but extremely high yields (above 8–10%) often signal financial distress. Investigate why before buying.
- Payout ratio: Percentage of earnings paid out as dividends. A 40% payout ratio is sustainable. A 90% payout ratio means the company has almost no earnings left to reinvest, a warning sign that the dividend may be cut.
- Dividend growth history: Companies called “Dividend Aristocrats” have raised their dividend every year for 25+ consecutive years. This consistency is a signal of financial strength, not just current yield.
Step 2 — Open a brokerage account (Saturday, 1–2 hours)
You need a brokerage account to buy stocks and ETFs. For most beginners, these are the cleanest options:
- Fidelity: No account minimums, no trading fees, excellent dividend reinvestment tools, strong research resources. A reliable choice for long-term investors.
- Charles Schwab: Similar to Fidelity, no minimums, no fees, excellent for dividend investors. Schwab’s fractional shares feature lets you buy into expensive stocks with small amounts.
- M1 Finance: Designed specifically for long-term, automatic investing. You set target allocations, and M1 handles rebalancing. Excellent for set-and-forget dividend portfolios.
Opening an account takes 15–30 minutes online. You’ll need your Social Security Number (for US accounts), a bank account to fund it, and a government-issued ID. Most accounts are approved the same day.
Step 3 — Start with dividend ETFs, not individual stocks (Sunday, 1 hour)
Individual stock picking is risky when starting. A single company can cut its dividend, report a bad quarter, or go bankrupt. Dividend ETFs (Exchange-Traded Funds) spread your investment across dozens or hundreds of dividend-paying companies, dramatically reducing the risk of any one company hurting you.
Well-established dividend ETFs worth researching (not financial advice, do your own due diligence before investing):
- VYM (Vanguard High Dividend Yield ETF) provides broad exposure to high-yield US stocks with a very low expense ratio.
- SCHD (Schwab US Dividend Equity ETF) focuses on dividend growth quality, not just current yield. Very popular among long-term investors.
- DGRO (iShares Core Dividend Growth ETF) emphasizes companies with consistent dividend growth over raw yield.
Research each on Yahoo Finance or ETF Database. Look at the 5-year return, the current yield, the expense ratio, and the top holdings. Compare two or three before deciding.
Step 4 — Set up automatic contributions (Sunday, 30 minutes)
The most important dividend investing habit isn’t picking the right ETF; it’s contributing consistently. Set up a recurring automatic transfer from your bank account to your brokerage, even if it’s $50 or $100 a month. Automatic contributions remove the decision fatigue and the temptation to “wait for a better entry point.” Time in the market beats timing the market, consistently, over decades.
Enable DRIP (Dividend Reinvestment Plan) in your brokerage account settings. DRIP automatically uses your dividend payments to buy more shares instead of sitting as idle cash. This compounding effect is where dividend investing’s real power comes from over the years and decades.
Stream 5: Creating and selling an online course
What it is and why it works
An online course is a structured video or text-based learning experience that teaches a specific skill. You record it once and sell it repeatedly. Unlike consulting or freelancing, your time is completely decoupled from your income. 1,000 students can take your course in the same time it takes 1 student, at no additional cost to you.
Courses have the highest income ceiling of any stream on this list. A well-positioned course selling at $197 to 100 students a month earns $19,700 monthly from content you recorded in a weekend and a few days after.
Step 1 — Define your course topic with precision (Friday night, 1 hour)
The most common mistake course creators make is choosing a topic that’s too broad. “How to use Excel” will not sell. “How to build automated financial dashboards in Excel for small business owners” will sell. The more specific the promise, the easier it is for the right buyer to say “that’s exactly what I need.”
Your course topic must satisfy three conditions simultaneously:
- You know this material well enough to teach it without researching while recording.
- There are people who want to learn this skill and are willing to pay for structured teaching.
- The skill has a clear outcome: students should be able to do something specific after completing your course.
Validate demand before recording a single video. Search your topic on Udemy, Teachable, or Skillshare. If other courses on the topic exist and have reviews, that’s proof of demand, not competition to fear, but validation that people pay to learn this. No courses on a topic usually means no market, not a gap you’ve found.
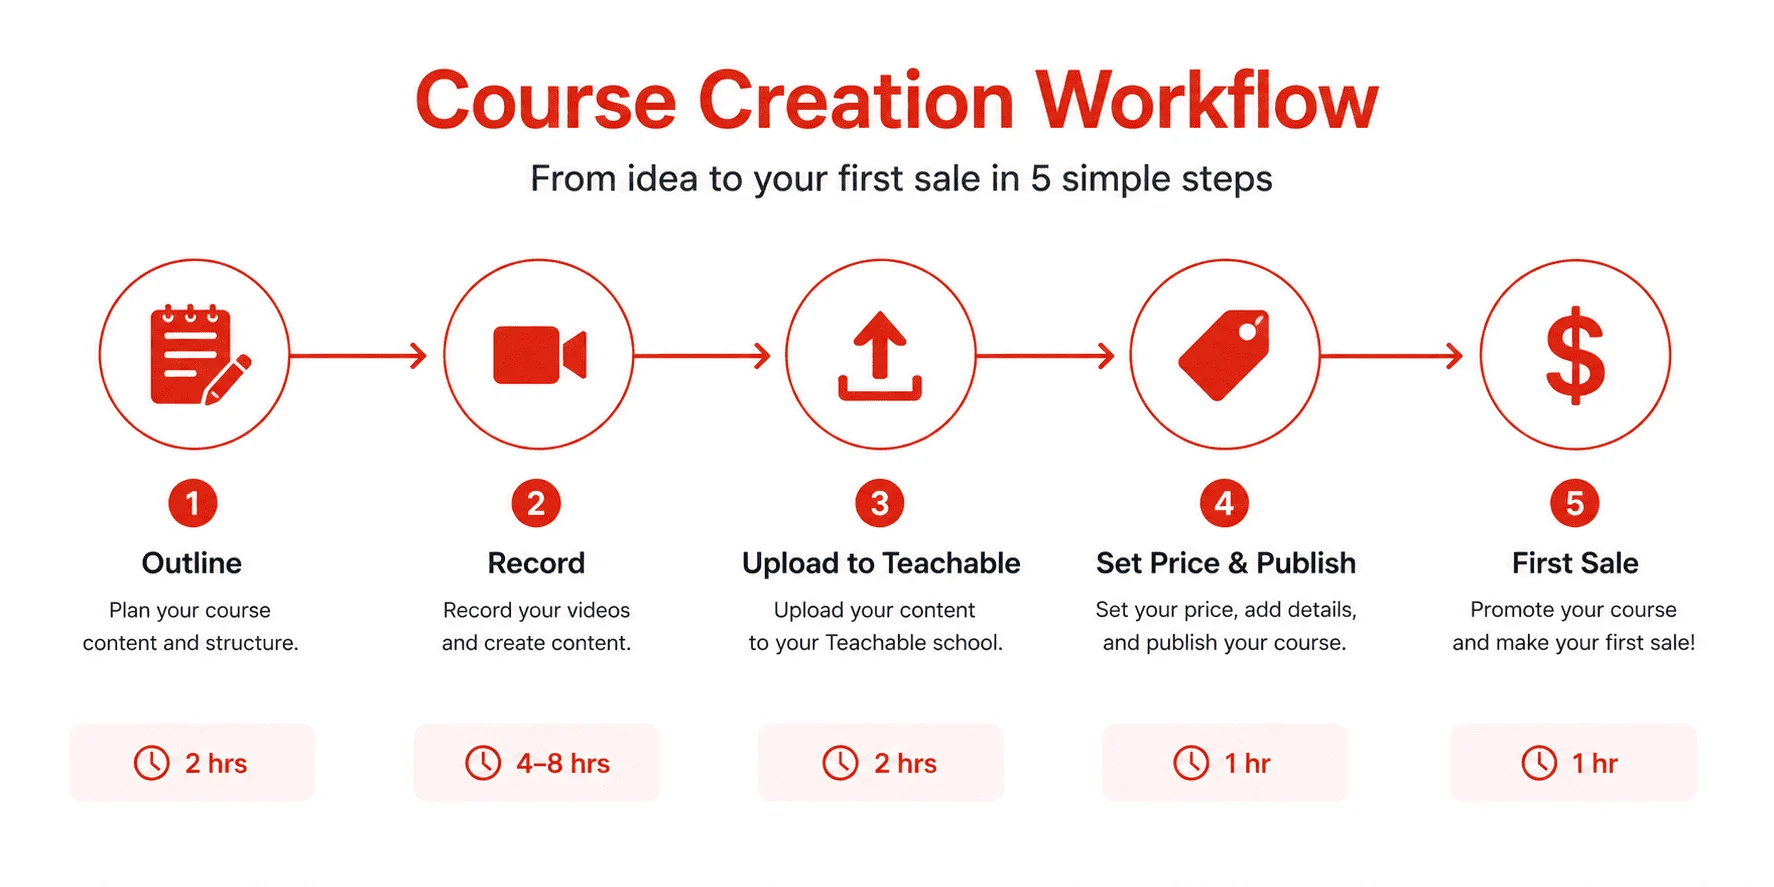
Step 2 — Outline your course (Saturday morning, 2 hours)
Structure your course as a series of modules, each teaching one concept. Each module contains 2–5 short lessons. Shorter is almost always better. Learners complete short lessons; they procrastinate on long ones.
A practical outline structure for a beginner course:
- Module 1 — Foundation: What is X, why it matters, what you’ll be able to do by the end.
- Module 2 — Setup: Everything the student needs to install, create, or prepare before learning the core skill.
- Module 3 — Core skill, part one: The first and most fundamental thing they need to learn.
- Module 4 — Core skill, part two: Building on module 3 with the next layer of complexity.
- Module 5 — Real-world application: A complete walkthrough of using the skill on an actual project.
- Module 6 — Next steps: Where to go from here, common mistakes to avoid, and advanced resources.
Aim for 8–15 total lessons across all modules. A tightly focused course that fully delivers its promise is worth far more than a sprawling course that tries to cover everything.
Step 3 — Record your course (Saturday afternoon + Sunday morning, 4–8 hours)
You don’t need a studio. You need a quiet room, decent lighting, and one of these setups:
- Screen recording + voiceover: Best for software, coding, design, or any skill performed on a computer. Use Loom (free), OBS Studio (free, more control), or Camtasia (paid, easier editing).
- Talking-head video: Best for coaching, business skills, communication, or anything where your presence matters. A modern smartphone on a tripod records in 4K. Natural window lighting beats most artificial setups.
- Slides + voiceover: Best for conceptual or theoretical topics. Create slides in Google Slides or Canva, record with Loom or OBS, presenting in full screen.
Record each lesson in one take as much as possible. Don’t aim for perfection, aim for clarity. Students forgive small stumbles. They don’t forgive confusion. A lesson that clearly teaches one thing is a good lesson, regardless of whether you said “um” twice.
Step 4 — Publish your course on a platform (Sunday afternoon, 2 hours)
For your first course, use a platform that handles payments, hosting, and student management so you can focus on the content, not the infrastructure.
- Teachable: Clean interface, easy course builder, free plan available (they take a transaction fee). Ideal for creators who want their own branded school.
- Gumroad: If you already set it up for Stream 1, you can upload video files as a digital product. Less purpose-built for courses but perfectly functional for simpler formats.
- Udemy: Built-in marketplace with millions of students. You sacrifice pricing control (Udemy frequently discounts courses to $15–20) but gain built-in traffic without marketing. Good for volume; less good for premium positioning.
Upload your video files, arrange them in order, write a compelling course description (lead with the outcome: “By the end of this course, you will be able to…”), set your price, and publish. Done. Your course is live and purchasable.
Step 5 — Make your first sales (Sunday evening, 1 hour)
Launch to your warmest audience first. Email your list if you have one. Post about it on the platform where you’re most active. Direct message 10 people you know would benefit, not to pressure them, but because a personalized “I made something you’d find useful” lands differently than a broadcast announcement.
Offer the first 5 buyers a meaningful discount in exchange for an honest review. Reviews on Teachable and Udemy are what convert strangers who find your course later through search. Zero reviews means zero social proof, which means a much harder path to sales from cold traffic.
The weekend schedule: exactly how to spend 48 hours
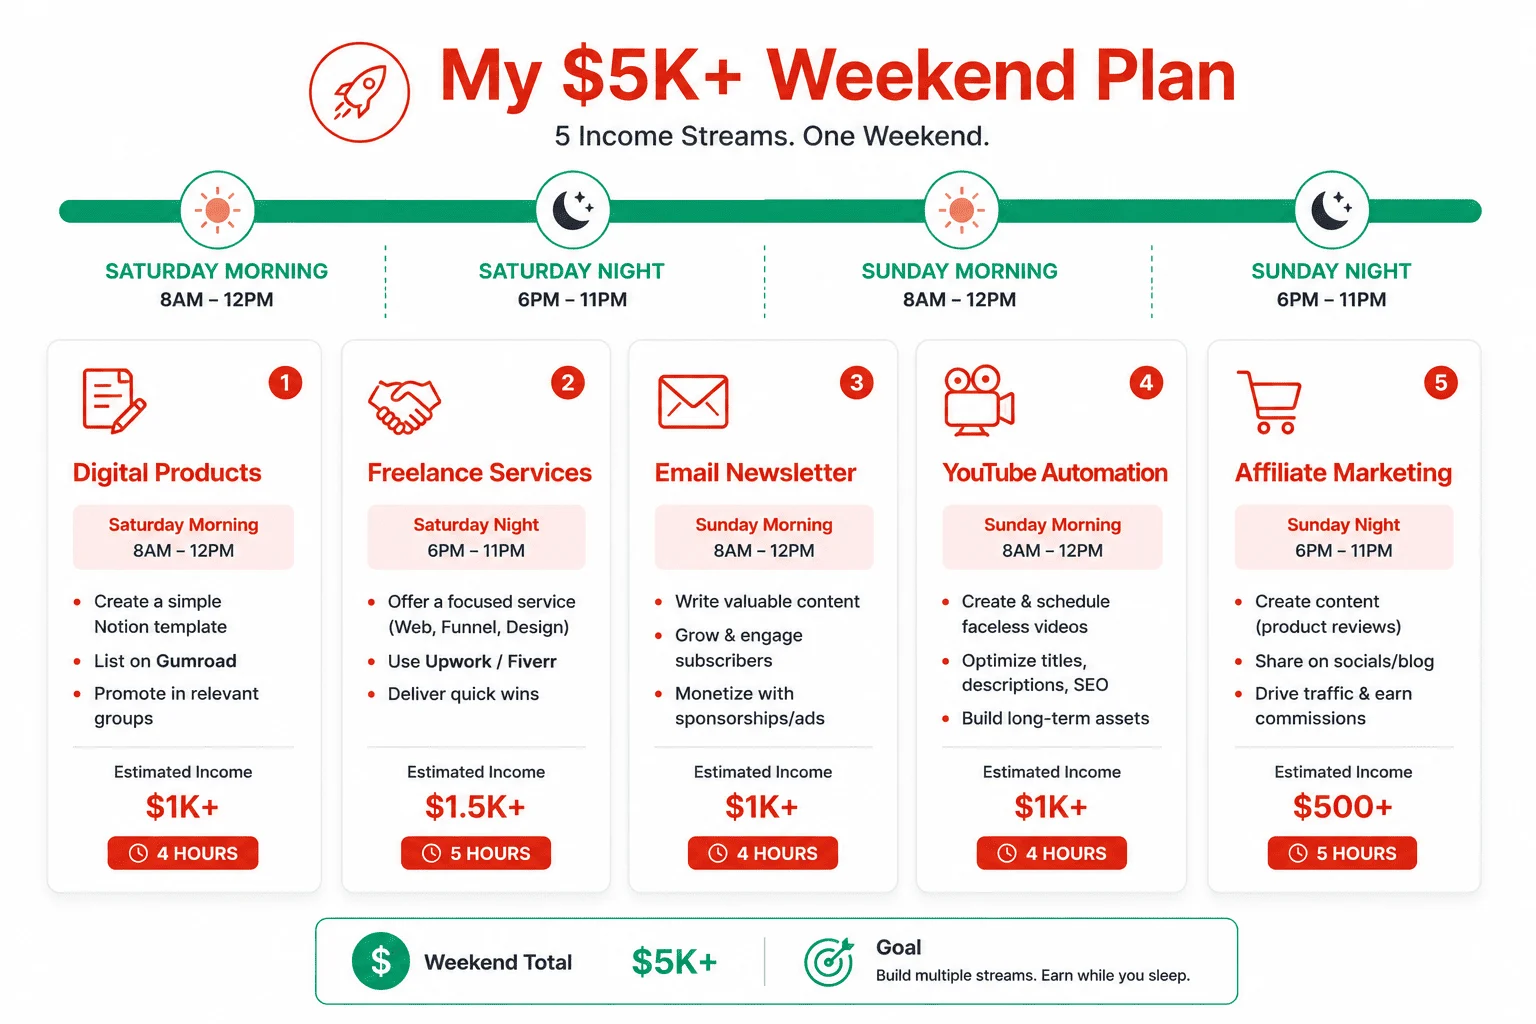
Here’s a concrete time block plan if you’re starting from zero and picking one stream:
| Time block | Task | Applies to stream |
|---|---|---|
| Friday night (1–2 hrs) | Decide your stream, research your topic or product idea | All streams |
| Saturday 9 AM – 1 PM | Create the core asset (product, designs, course outline, research ETFs) | All streams |
| Saturday 2 PM – 5 PM | Set up the platform (Gumroad, Redbubble, brokerage, Teachable) | All streams |
| Saturday 5 PM – 8 PM | Polish the asset, write descriptions, set pricing | All streams |
| Sunday 9 AM – 12 PM | Publish / go live / fund the account | All streams |
| Sunday 1 PM – 3 PM | Write your first promotional post or email, share with warm audience | Streams 1, 2, 3, 5 |
| Sunday 3 PM – 5 PM | Set up tracking, analytics, or auto-invest (depending on stream) | All streams |
Mistakes that will kill your passive income before it starts
These mistakes are not theoretical, I made every one of them. Learn from the list, not from experience.
- Perfecting instead of publishing. A published product earning $0 is infinitely more useful than a perfect product that never launches. You learn what works only when real buyers interact with it.
- Starting all five streams at once. You’ll have five half-finished setups and zero income. One complete stream beats five partial ones. Finish one, earn from it, then add the next.
- Ignoring the marketing half of the equation. Creating the product is 50% of the work. Telling people about it is the other 50%. Many creators build a great product, then wait passively for buyers to find it. Passive income is not passive marketing.
- Choosing based on what pays the most, not what you know. The stream that works is the one you’ll actually follow through on. Pick the one that uses skills you already have.
- Expecting results in week one. Dividend investing takes years to compound meaningfully. Affiliate SEO takes months to rank. POD stores take months to build catalogue depth. The timeline is real; set your expectations accordingly and don’t quit during the growth phase.
Quick reference: all five streams at a glance
| Stream | Startup cost | Setup time | First income timeline | Income ceiling | Best for |
|---|---|---|---|---|---|
| Digital products | $0 | 1 weekend | Days to weeks | High | Skilled creators |
| Affiliate marketing | $0–$50 | 1 weekend | 1–6 months (SEO) | Very high | Writers, bloggers |
| Print on demand | $0 | 1 weekend | Weeks to months | Medium | Designers, niche fans |
| Dividend investing | $500+ | 1 weekend | Immediate, grows slowly | Unlimited (scales with capital) | Anyone with savings |
| Online courses | $0–$100 | 1–2 weekends | Days to weeks | Very high | Experts and teachers |
You already have this weekend, use it
The gap between people who have passive income and people who want it is almost never knowledge. The information is all publicly available. The gap is execution: actually finishing a setup instead of researching it indefinitely.
You now have the complete step-by-step for all five streams. Pick one. Block the time. Follow the steps in sequence. By Sunday evening, you can have a live asset in the world that has the potential to earn while you sleep.
The best passive income stream is the one that’s actually running. Start there.
Further reading and tools: